The Hidden Cost of Choosing the Wrong Deck Sealer
Your deck is a ticking time bomb. Every day, it battles relentless sun, torrential rain, and the relentless march of time. Most homeowners think a quick trip to the local store for a one-gallon can of sealer is the silver bullet. They spend a weekend prepping and painting, feeling accomplished. Two years later, they stare at peeling, graying wood, wondering what went wrong. They didn’t just waste a weekend; they lit the fuse on a potential $15,000 to $30,000 deck replacement.
Note: Prices are just examples and may not reflect actual costs.
The internet is flooded with conflicting advice, brand promotions, and DIY forums where everyone is an expert. The truth is, choosing the right sealer isn’t about finding the single “best” product—it’s about a precise diagnosis, the same principle behind professional deck waterproofing services in Orange County. It’s about understanding your specific wood type, your local climate, and your long-term goals. Choosing incorrectly isn’t a minor setback. It’s an expensive mistake that can accelerate rot, attract destructive pests like carpenter bees, and transform your beautiful outdoor space into a splintery, unsafe liability.
This isn’t another generic guide filled with fluff. This is the candid conversation you’d begin with a seasoned professional who has restored hundreds of decks and seen every costly mistake. We will cut through the noise and share great info about what truly matters: maximizing long-term value and bulletproofing your investment. Forget the marketing hype. It’s time for some hard truths.
Stop the Rot: How Inaction Costs You Thousands
Most people drastically underestimate the destructive power of the elements. They see a little graying on their pressure-treated wood and think, “I’ll get to it next year.” That’s a catastrophic financial error. An unprotected wood surface is a sponge. Rain soaks in, feeding mold and mildew. The sun’s powerful UV rays bake the surface, breaking down wood fibers and causing them to splinter and crack. What starts as a cosmetic issue quickly escalates into a structural nightmare.
Let’s quantify the “cost of inaction.” A small spot of rot, if ignored for a single season, can spread to compromise an entire deck board. The cost to replace one board might be a few hundred dollars. But if that rot spreads to the joists and support structure underneath, you’re no longer talking about a simple repair. You’re talking about a complete teardown and rebuild. The average cost for a new wood deck is well over $10,000, and for larger or more complex designs, it can easily exceed $30,000.
Suddenly, the $500 to $1,500 you might have spent on professional sealing seems like an absolute bargain. The decision is clear: Homeowners who act decisively, who treat their deck like the valuable asset it is, enjoy decades of safe, beautiful use. Those who delay, who try to cut corners, are often forced into a massive, unplanned expense just a few years down the line. They learn the hard way that doing nothing, or doing the job poorly, makes things exponentially worse.
Note: Prices are just examples and may not reflect actual costs.
Why DIY Deck Sealing Fails—and How to Avoid the Most Common Mistakes
There’s a pervasive myth that sealing a deck is as easy as painting a wall. This is precisely where good intentions pave the road to a peeling, blotchy disaster. The failure isn’t usually in the can of sealer itself; it’s in the 90% of the work that comes before you even open it. Here’s where the weekend warrior often goes wrong:
Mistake 1: The Perils of Poor Prep Work
You cannot put a new finish on a dirty, compromised surface—a principle emphasized in the ultimate waterproof coating guide for wood deck protection and maintenance. Most people do a quick first pressure washing and call it a day. This is a critical mistake. The goal of the initial pressure washing isn’t just to remove dirt; it’s to meticulously remove the old stain and any gray, oxidized wood fibers. This often requires specific cleaners or strippers, followed by a wood brightener to balance the pH and open the wood’s pores to accept the new sealer properly.
Improper pressure washing can be incredibly destructive. Using too much pressure (e.g., a 0-degree tip) on an old wood deck can fuzz the wood grain, creating a terrible texture that will never look fine. Insufficient cleaning leaves behind an invisible film of pollen, grime, and mildew spores, guaranteeing the new sealer won’t adhere properly and will fail within a year. Proper prep might also involve sanding to knock down splinters and smooth the floor surface, a crucial step most DIYers skip.
Mistake 2: Choosing the Wrong Product for Your Deck’s Needs
Grabbing a can of “Ready Seal” stain because your neighbor used it is a significant gamble. Is his deck in full sun like yours? Is it the same type of treated wood? Is it a brand-new deck or a 10-year-old weathered deck? A high-quality semi-transparent stain that looks stunning on a new cedar deck will look blotchy and uneven on an older, more porous pine deck. An older deck with imperfections may desperately need a semi-solid or opaque stain to provide a uniform finish and excellent protection with superior UV protection.
Choosing a water-based stain to apply over an old, improperly stripped oil-based product will cause the paint to peel within weeks. You must know precisely what you are working with. Without that knowledge, you are simply guessing, and your investment is at risk.
Mistake 3: Botched Application Techniques
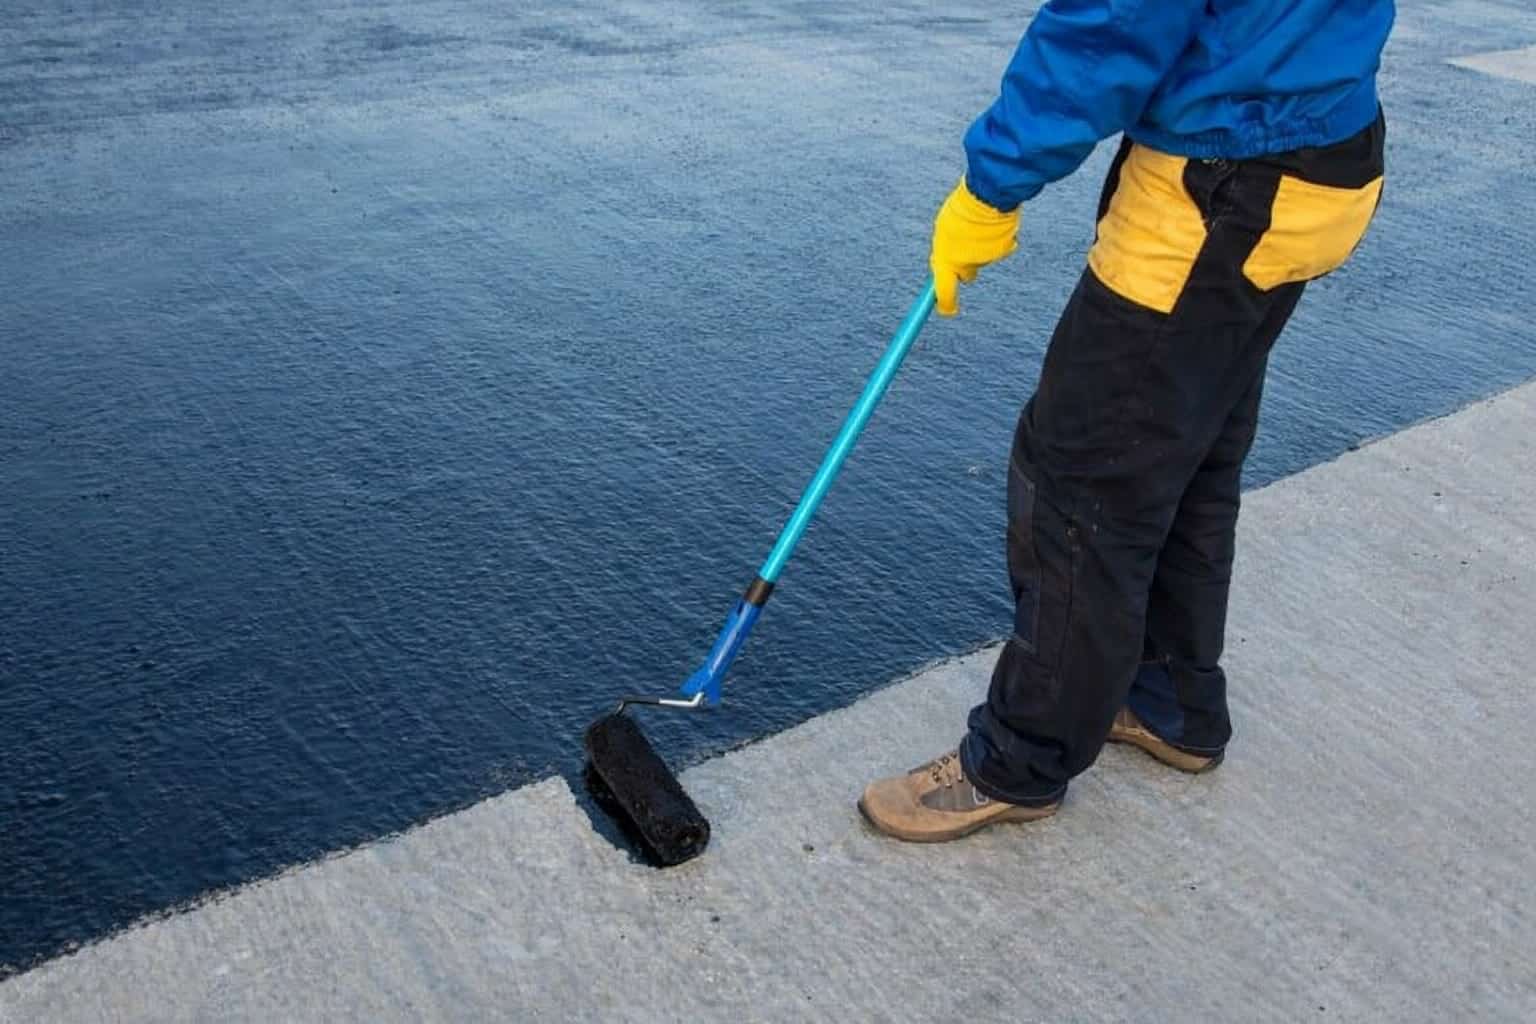
Even with the right product and perfect prep, application technique is paramount—something detailed in the waterproofing and painting guide to keep your deck and home safe from water damage. The most common DIY error is creating “lap marks.” This happens when you apply sealer and let one section dry before blending in the next, leaving dark, unsightly overlapping lines. A professional works in small, manageable sections, always maintaining a “wet edge” to ensure a perfectly uniform coat. They know how to apply the product with a brush, roller, or sprayer to achieve the precise thickness. Too thin, and you get inadequate protection. Too thick, and the sealer sits on top of the wood like a film, destined to peel and flake rather than penetrate and protect.
Demystifying the Aisle: Your Clear Guide to Sealer Types
Walking into the paint aisle can feel utterly overwhelming. Let’s simplify it. The best sealers fall on a spectrum of transparency and are primarily either water-based or oil-based. Understanding these fundamental categories is the first step to making an intelligent, lasting choice.
The Great Debate: Water-Based vs. Oil-Based Stains
For decades, oil-based stains were the undisputed champions for robust protection. They penetrate deep into the wood deck, condition the fibers, and impart a rich, natural look. They are generally easier for beginners to apply because they dry more slowly, significantly reducing the risk of lap marks. The downsides? They have higher VOCs (volatile organic compounds), a more pungent, lingering smell, and require mineral spirits for cleanup. They also tend to feed mold and mildew more than their water-based counterparts, unless formulated with quality mildewcides.
Water-based stains have improved dramatically in recent years—an evolution often discussed when choosing the right deck repair contractor in Orange County. Modern water-based formulas offer excellent durability and superior UV protection. They boast low VOCs, are easy to clean up with just soap and water, and are inherently more resistant to mold growth. The challenge is that they dry quickly. This makes the application tricky; you must work fast and methodically to avoid those dreaded lap marks. They also may not penetrate as deeply as oil on the first coat, sometimes requiring a more rigorous prep process to ensure proper adhesion.
The Transparency Scale: How Much Wood Grain Do You Want to Preserve?
The most significant aesthetic and protective decision you will make is the level of transparency you choose for your stain. This impacts both the visual appeal and the longevity of the finish.
- Clear Water Repellent: These are essentially a wood sealer with no color. They offer some moisture protection but almost zero UV protection. The sun’s rays will still turn your wood gray underneath them. Frankly, for a horizontal surface like a deck floor in full sun, I consider them a waste of money and precious time. They do not last.
- Semi-Transparent Stain: This is the sweet spot for many homeowners. A semi-transparent stain has enough pigment to provide good UV protection while still allowing the natural beauty of the wood grain to show through. This is the ideal choice for new or well-maintained decks where you want to highlight the wood itself. They offer a rich, natural, unpainted look.
- Semi-Solid Stain: One step up in opacity, a semi-solid stain offers more color and effectively hides minor imperfections and discolorations in older wood—an option often considered when evaluating the cost to waterproof a deck. You will still perceive some wood texture, but the grain will be mostly obscured. This is an excellent product for decks that have some weathering but do not yet need a full solid color. It provides more UV protection than a semi-transparent, which often translates to a longer life for the finish. Many manufacturers offer free samples to test colors on your specific wood.
- Opaque Stains (Solid Color): These look like paint but are specifically formulated to breathe and flex with the wood. An opaque stain offers the best possible UV protection and can completely hide the “sins” of a previous owner, including mismatched boards, stubborn stains, and heavily weathered gray wood. It is the ultimate solution for an ancient deck in need of a total facelift. The trade-off is that it completely hides the wood grain, and if the prep is not absolutely perfect, it can peel just like conventional paint.
Deck Stain Types at a Glance: Your Comparison Guide
To make the decision more straightforward, here is a breakdown of how the different types of deck stains and sealers stack up. Choosing the right one is critical for the long-term health and beauty of your exterior wood surfaces.
The Real Secret: It’s the ‘Right System,’ Not Just the ‘Best’ Sealer
Here’s the unique insight you won’t get from a hardware store brochure: Stop looking for a single magic product. The best long-term value comes from implementing the right system for your specific deck. A comprehensive system includes accurate diagnosis, meticulous preparation, precise product selection, and expert application. Get one part wrong, and the entire system fails, leading to premature deterioration.
Think of it like a doctor prescribing medicine. They don’t just hand out the “best” pill. They diagnose the patient first. Your deck is the patient.
Case Study 1: The Peterson’s Peeling Nightmare (Costly DIY Failure)
The Petersons, of 123 Main Street, had a 10-year-old pressure-treated wood deck that was showing significant age. They bought a highly-rated semi-transparent stain, did a quick power wash, and spent a weekend applying it. Within just 18 months, it was severely flaking and peeling, especially in areas exposed to full sun. The wood underneath was gray and splintering. They were frustrated and ready to tear the entire thing down, facing a potential $18,000 replacement bill.
Note: Prices are just examples and may not reflect actual costs.
The Diagnosis: Their mistake was twofold. First, their quick wash did not remove all of the old, failing sealer or the oxidized wood fibers. The new stain had nothing adequate to grab onto. Second, their old wood was too porous and inconsistent for a semi-transparent product. The stain soaked in unevenly, creating a blotchy look before it ultimately failed.
The Right System: A professional deck restoration team was called in. They started by chemically stripping the failing stain, followed by a thorough but careful low-pressure washing and a wood brightener. Because the wood had significant imperfections, they recommended a darker color semi-solid stain. This provided enough pigment to hide the blemishes and create a uniform look, while its high-quality acrylic resins offered superior UV protection. The result? A deck that looked almost new for a fraction of the replacement cost, and a finish that will last 3 to 4 years before needing a simple maintenance coat, not a complete stripping.
Case Study 2: The Chen’s Brand New Ipe Deck (Saved from Disaster)
The Chens, residing at 456 Oak Avenue, invested a significant amount of money (over $25,000) in a beautiful new Ipe deck, a dense and exotic hardwood. Worried it would fade, they wanted to protect it immediately. Their contractor, a framer, not a finisher, suggested a thick, film-forming sealer he had in his truck.
The Diagnosis: Thankfully, the Chens hesitated. Ipe is an incredibly dense, oily wood. Most domestic deck sealers, especially film-formers, will not penetrate it. The sealer would have sat on the surface like a coat of plastic, only to bubble and peel away within a single season, creating a nightmare removal job that could have cost them an additional $5,000+.
Note: Prices are just examples and may not reflect actual costs.
The Right System: After some research, they learned that new pressure-treated wood and dense hardwoods like Ipe need to weather for a few months to allow surface oils to dissipate and the pores to open. They needed a specific type of penetrating oil-based sealer formulated for exotic hardwoods. They chose a high-quality product that soaks in, enriching the wood from within rather than coating it. Now, once a year, they perform a simple cleaning and reapply a light coat. The wood is protected, the gorgeous grain is the star of the show, and their massive investment is secure for the long haul.
These examples prove that the brand of sealer, whether it’s “Ready Seal” or something else, is only one piece of the puzzle. Without the correct diagnosis and system, even the best product is destined to fail.
Banish Analysis Paralysis: Protect Your Investment Today
You’ve just absorbed a wealth of great info about prep work, transparency levels, oil versus water, and the critical importance of a systematic approach—many of the same considerations outlined in the top features that make a wood sealer the best outdoor wood sealant. At this point, you might feel more confused than when you started. You’re worried about making things worse, wasting money on the wrong product, or spending several weekends stripping and re-staining. This is analysis paralysis, and it’s almost as damaging as making the wrong choice, because while you hesitate, the elements are still relentlessly attacking your deck.
Here’s the truth: you can spend another 10 hours on YouTube and reading forums, or you can get a definitive, personalized answer for your specific situation in 30 minutes. The difference between a deck that lasts longer and one that becomes a money pit is expert guidance.
You wouldn’t diagnose a strange noise in your car’s engine by yourself; you would take it to a trusted mechanic. Your deck, a significant component of your home’s value and your family’s enjoyment, deserves the same professional respect. To get this right and ensure the best long-term value, you need a plan based on a professional assessment of your deck’s condition, wood type, and sun exposure.
The fastest way to avoid costly mistakes and get a guaranteed result is to get a professional deck inspection and consultation. It is the logical next step to transform your research into a concrete, practical action plan.
What to Expect: Your Free, No-Pressure Deck Inspection
We understand why you might hesitate to call a professional. You worry about a high-pressure sales pitch or being quoted an astronomical price. Let us put that fear to rest. Our goal is to empower you with accurate information, not to pressure you into a sale. Reducing your risk and building your confidence is our priority.
Here is exactly what to expect when you schedule your complimentary inspection with Prestige Decking:
- A Simple, Respectful Conversation: One of our seasoned deck experts will arrive on time and, most importantly, listen intently. What do you envision for your deck? How do you use the space? What is your budget and long-term goal?
- A Thorough, Hands-On Assessment: We examine everything. We meticulously identify the wood species, assess the condition of the surface and the underlying structure, check for moisture damage or rot, and analyze how much sun and shade different areas receive. We will also carefully evaluate the state of any old stain or sealer still on the wood.
- A Clear, No-Obligation Action Plan: Based on our comprehensive findings, we will walk you through your best options. We will explain why a particular system (prep method + product type) is the optimal choice for your specific deck. You will receive a clear, itemized proposal detailing the scope of work and the exact cost. There are no hidden fees, no confusing jargon, and absolutely no pressure to decide on the spot.
Whether you choose to work with us or not, you will walk away from this consultation with more clarity and confidence about your deck’s needs than you could ever get from a blog post or a YouTube video. You will have a professional’s diagnosis and a clear path forward.
Frequently Asked Questions About Deck Sealing
How often should I seal my deck for optimal protection?
The frequency depends heavily on the type of sealer used and the amount of sun exposure your deck receives. A clear wood sealer may need reapplication every 6-12 months, while a quality semi-transparent stain on horizontal surfaces might last 2 to 3 years. A top-tier opaque stain can last 4 to 6 years on a deck floor and even longer on railings and vertical surfaces due to less direct wear and UV exposure.
Can I apply a water-based stain over an existing oil-based one?
This is a common and critical question. You can, but only if the old oil-based stain is completely weathered and worn away, or if it has been thoroughly stripped and prepped first. Applying a water-based product over a solid film of oil-based stain will almost certainly cause peeling, as the water-based formula cannot penetrate or adhere properly to the oily residue. When in doubt, you must strip it completely or stick with an oil-based product.
What’s the difference between a semi-transparent and a semi-solid stain?
The main difference lies in the pigment level. A semi-transparent stain has less pigment, allowing the natural wood grain and texture to show through clearly. A semi-solid stain has more pigment, which provides greater color, effectively hides minor wood blemishes, and offers slightly better UV protection, but it will obscure most of the wood grain.
Will pressure washing damage my wood deck?
It absolutely can if done incorrectly. Using a pressure washer with too high a PSI (e.g., above 1500 PSI for softwoods) or holding the nozzle too close to the surface (closer than 6-8 inches) can gouge the wood, cause splintering, and leave permanent, unsightly marks. Professional deck restoration uses the correct pressure and cleaners to clean the surface without causing damage.
How can I stop carpenter bees from drilling into my deck?
Carpenter bees are primarily attracted to unpainted and weathered wood. The best defense is a well-maintained, properly sealed finish. They are significantly less likely to drill into a deck that is adequately sealed or has a solid color stain. If you already have holes, treat them with an insecticide dust, then plug them with a wood dowel or exterior wood filler before staining to prevent re-infestation.
Your Next Step: Secure Your Deck’s Future for Decades
You now possess more actionable knowledge about deck sealers than 99% of homeowners. You understand that the product in the can is merely one component of a comprehensive system, and that meticulous preparation and accurate diagnosis truly deliver long-term value. You’ve seen how a few mistakes can lead to a peeling, expensive mess and how a ‘wait-and-see’ attitude can ultimately lead to a five-figure replacement cost.
The path forward is clear. You can gamble a few hundred dollars and several precious weekends on a DIY job that has a high probability of premature failure. Or, you can make an informed decision today that protects your investment for years, even decades, to come.
Do not let another season of sun and rain relentlessly degrade your valuable outdoor living space. The difference between a deck that lasts 5 years and one that lasts 25 is the choice you make right now. Stop guessing and get a specific, professional outcome.
The most intelligent, risk-free step you can take is to schedule your free, no-obligation deck inspection with our experts now. It’s time to get a professional plan that guarantees your deck’s longevity and beauty.