What You’ll Learn:
- Essential steps and materials to waterproof a plywood deck, protecting it from moisture, rot, and mold.
- Comparison of common waterproofing methods, including sealers, epoxy membranes, and elastomeric coatings, with tips on application and drying times.
- Practical advice on maintenance, troubleshooting, and choosing between DIY and professional services.
Waterproof Plywood Decking
Waterproofing a plywood deck can extend its life by 7 to 15 years and save thousands on repairs. Many homeowners skip this cost-effective process until mold, warping, or holes force them to make urgent fixes. Learn more about deck waterproofing services in Orange County and do it now to avoid bigger bills and disruption later.
Why Treating Your Plywood Deck Like a Roof Protects Your Investment
Plywood decking acts like a flat roof. Unsealed, moisture penetrates, weakening structural integrity and inviting mold and rot. In humid climates, neglect can reduce deck life by 30 to 60 percent within five years. Protect your framing and wood deck by waterproofing early.
Wood Deck Protection and Sealing Plywood for Longevity
Sealing plywood prevents water from penetrating the sheet material’s layers, causing warping, rot, and deterioration. Proper sealing maintains your deck’s strength and provides an aesthetically pleasing finish. To go deeper, review this ultimate guide to waterproof coating for wood deck protection and maintenance. Using the right sealers and applying them correctly is an important step in waterproofing decks.
A Reliable Waterproofing System for Flat Plywood Surfaces
Use a combination system: penetrating sealer or primer, epoxy or resin at seams, then a UV- and wear-resistant topcoat. Ensure full coverage, sealed edges, and filled holes to protect your wood deck from the elements and extend its durability.
Materials You Will Need
- Exterior-grade or waterproof plywood if replacing damaged panels
- Sandpaper or an orbital sander to smooth surfaces and edges
- Brushes, paint roller, and tray for primers, sealers, and topcoats
- Epoxy seam filler or resin for joints, gaps, and holes
- Quality sealant or sealer/varnish hybrid formulated for decks
- Optional: elastomeric membrane or liquid waterproofing system for maximum protection
- Polyurethane liquid rubber sealant designed specifically for decks and wood surfaces
Step-by-Step Application That Preserves Structure
Follow these steps to reduce risk and increase durability:
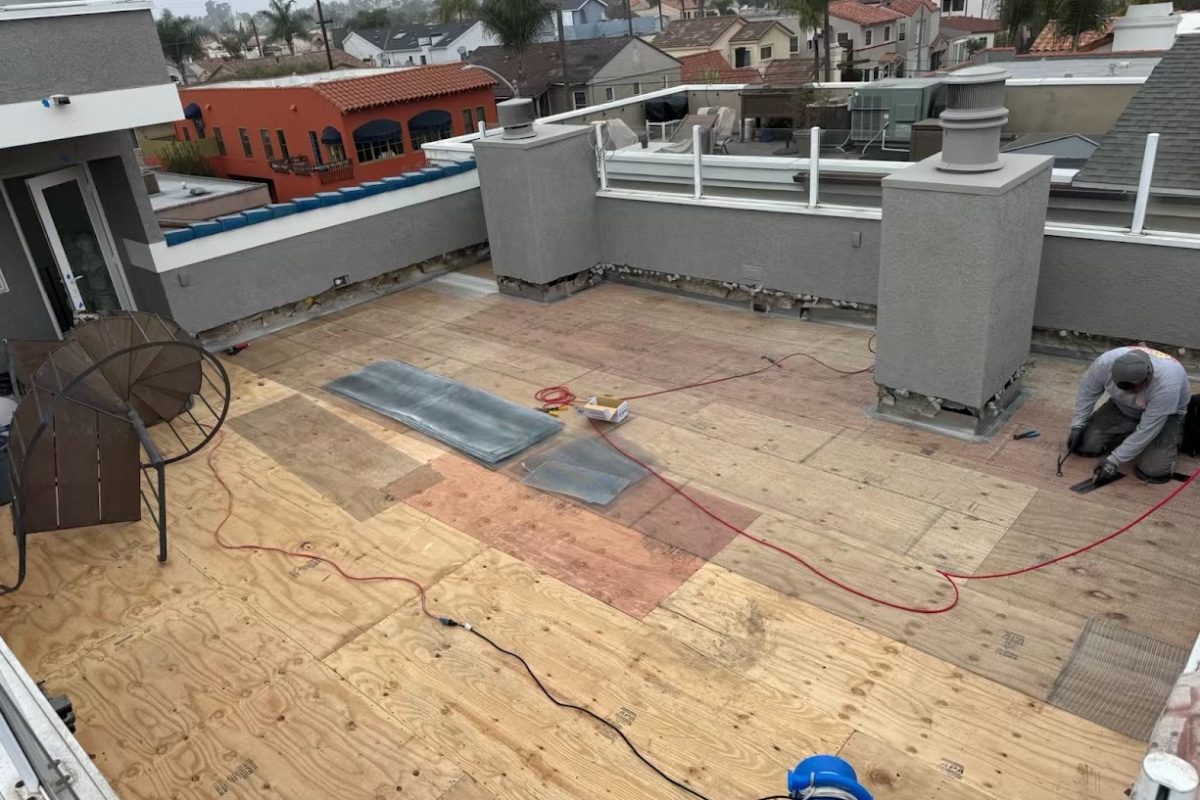
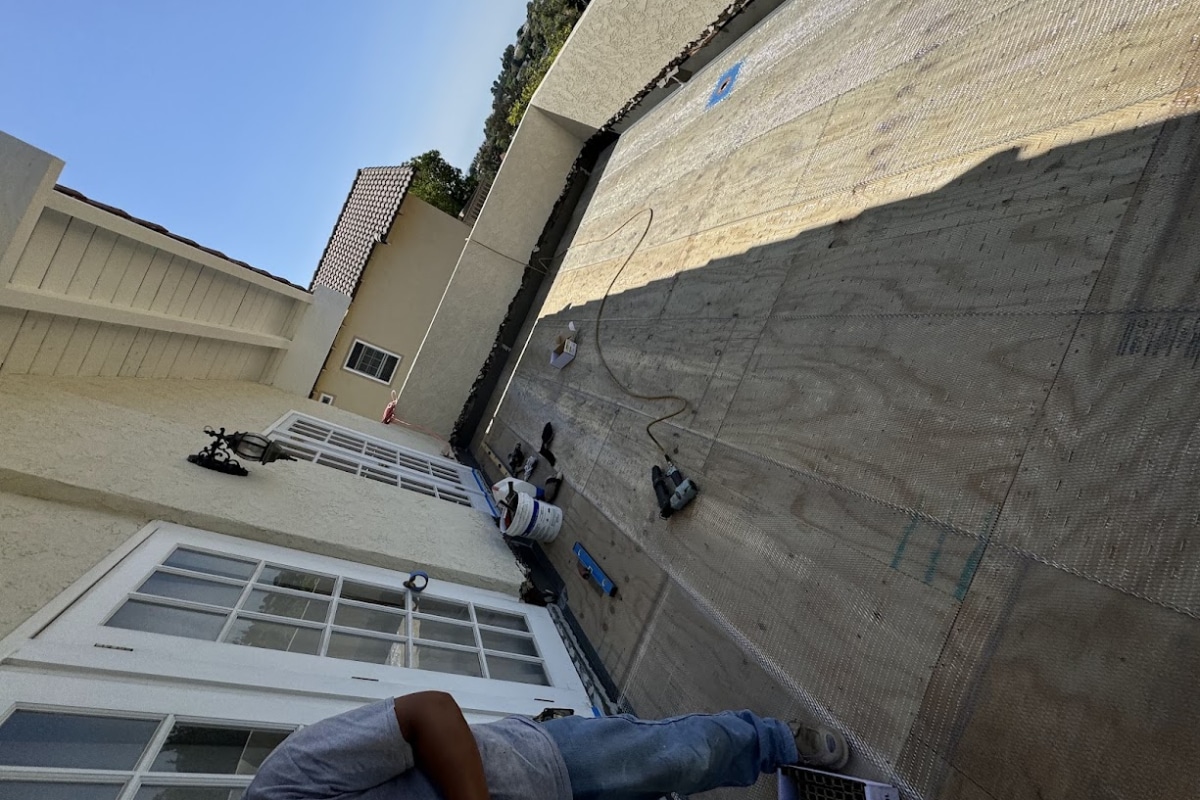
- First step: Inspect and clean. Remove dirt, debris, dust, and check for rot, holes, or lifted nails. Replace any soft plywood. Proper preparation is essential to avoid peeling or failure.
- Sand the surface and edges. Sand to roughen glossy finishes and remove contaminants so sealers bond well. Sanding prepares the entire surface for sealing plywood.
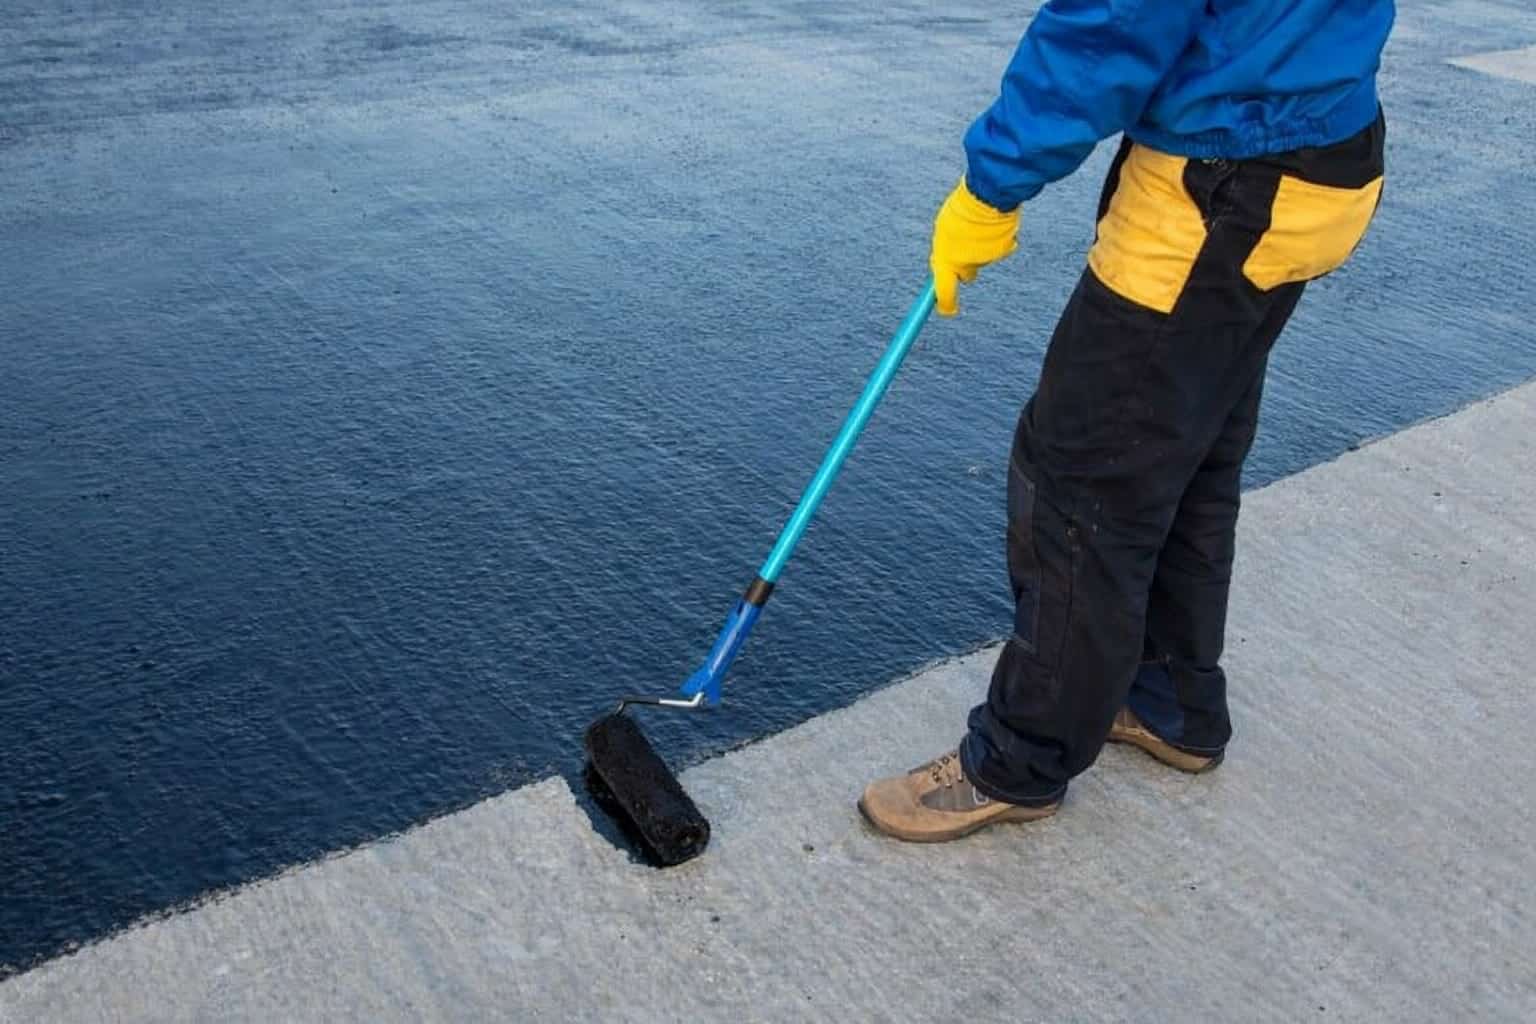
- Seal seams and holes. Fill joints and gaps with epoxy or resin. These cure in 24 to 48 hours. Seal plywood seams and edges carefully since end-grain absorbs water rapidly. Use polyurethane or elastomeric caulk on seams, gaps, and fastener heads for dependable waterproofing.
- Prime and apply the first coat. Use a quality primer or sealant as the first coat to promote adhesion of subsequent layers. Apply with a brush on edges and a paint roller on broad areas for even coverage. The first coat forms the foundation of your waterproofing system, enhancing durability and an aesthetically pleasing finish. For product guidance, explore deck sealers.
- Apply the top layers. Add two to three coats of your chosen waterproofing system, allowing proper drying between layers. Drying times range from 4 to 8 hours per coat; longer in high humidity. Applying the first coat evenly across the entire surface ensures a durable and pleasing finish. The best times to apply liquid rubber deck coating are spring or fall, when temperatures are cooler for better adhesion.
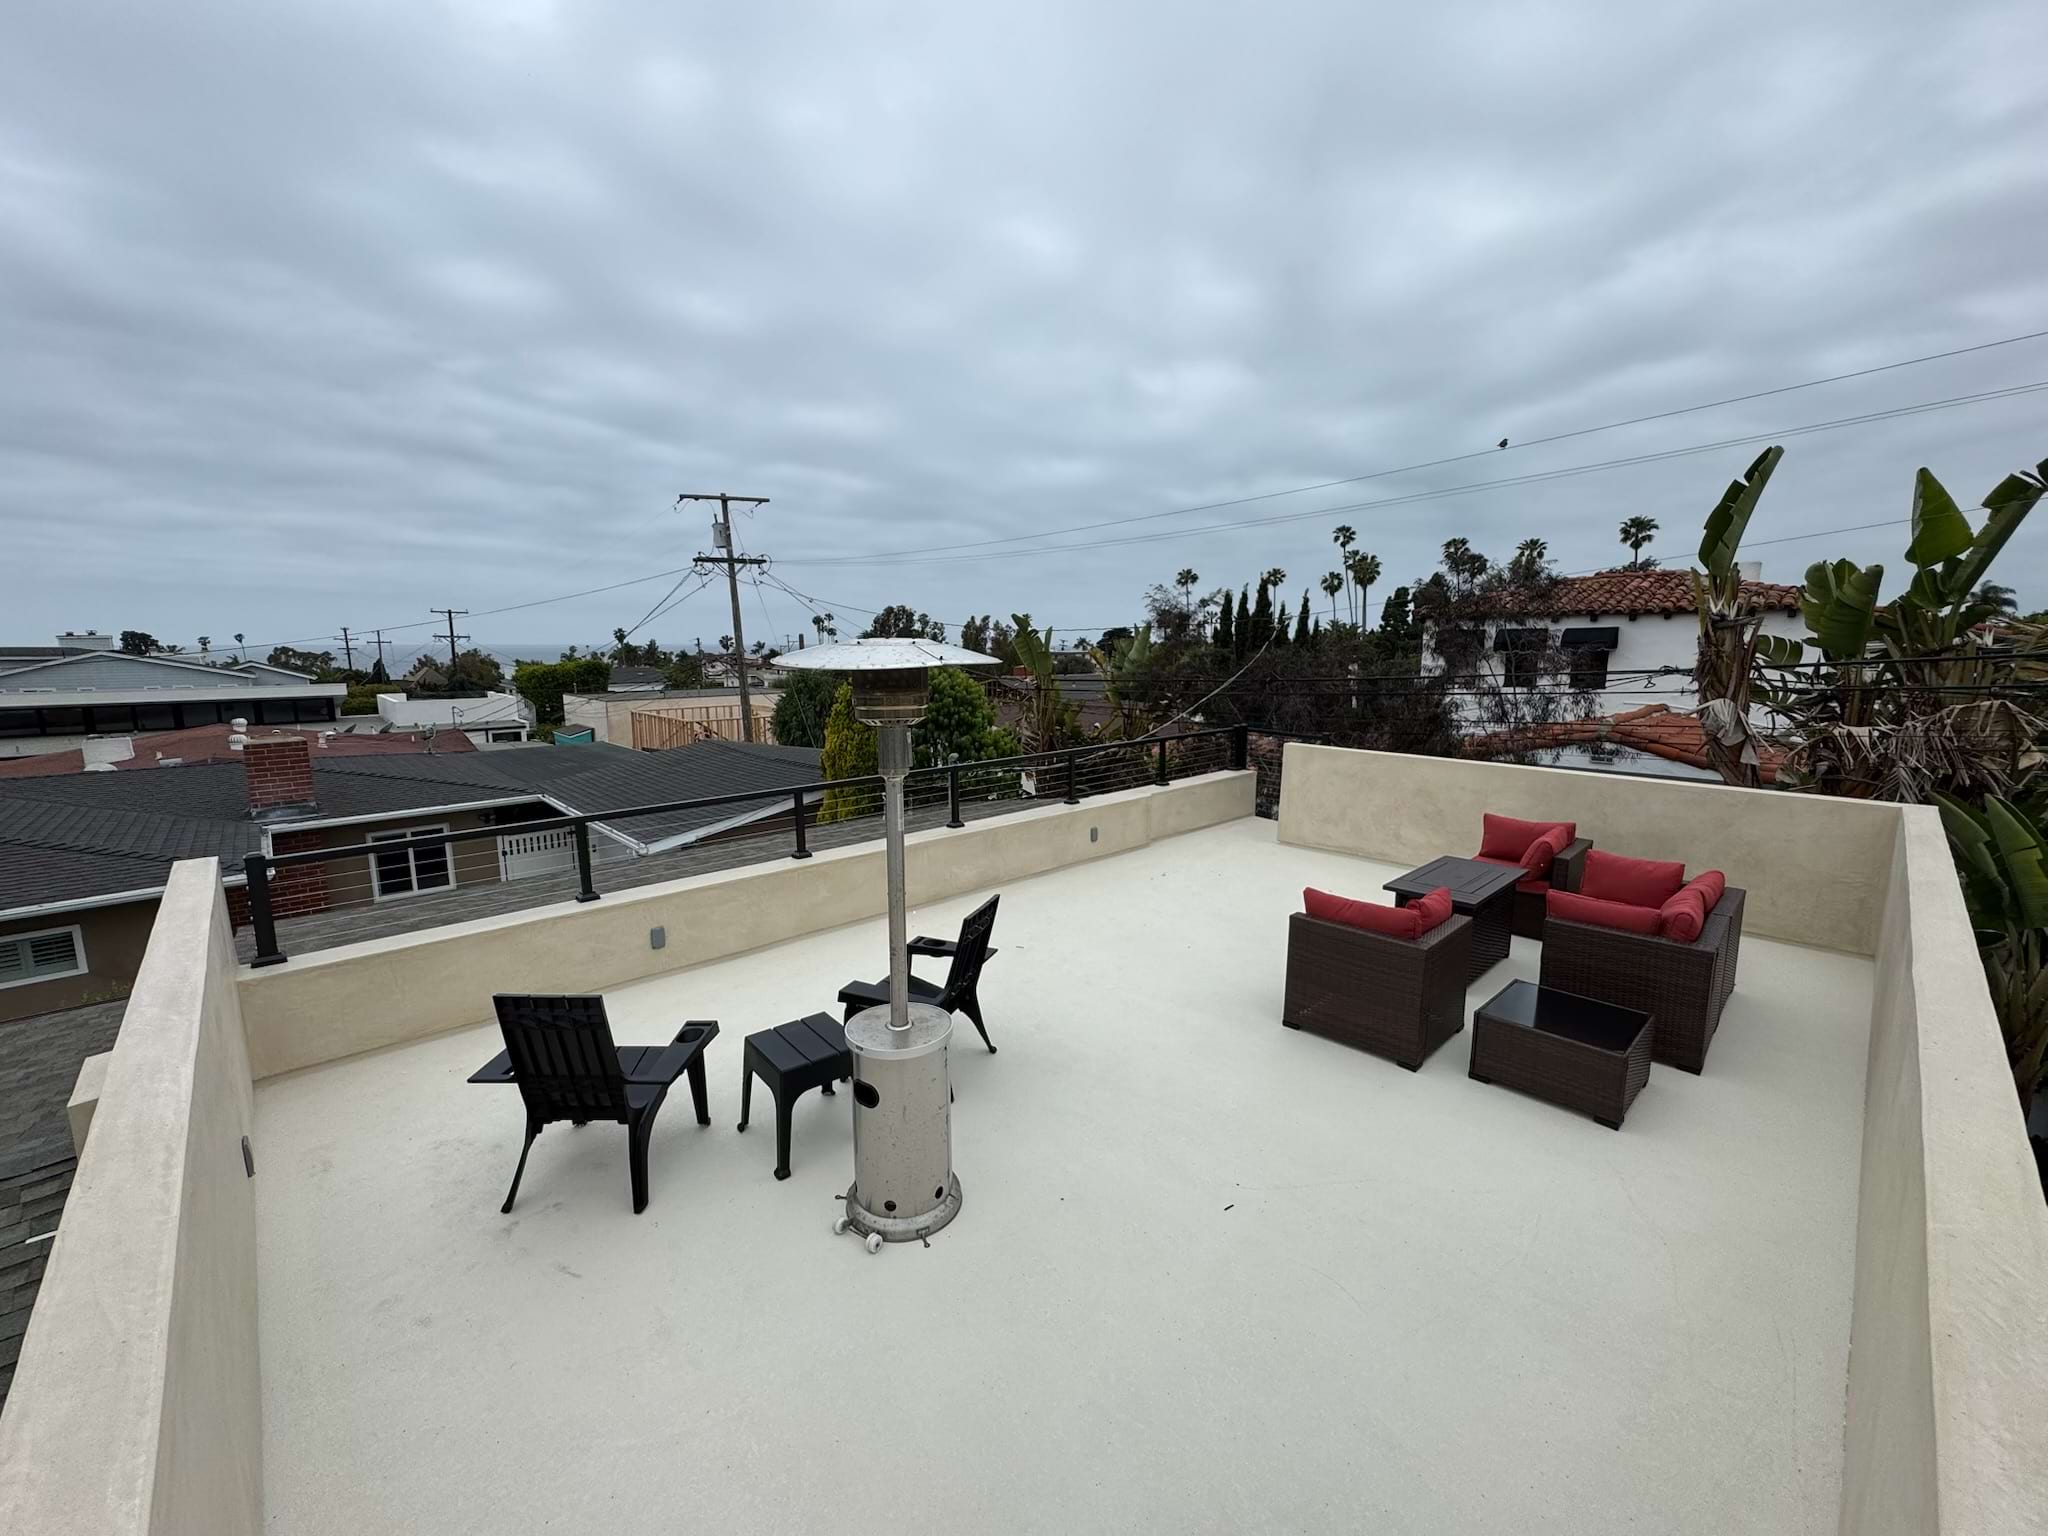
- Finish with a durable topcoat. Use a varnish or topcoat formulated to resist UV rays and wear. Let the deck dry completely and cure fully before heavy use to prevent premature failure. A UV-stable, non-skid topcoat protects the deck from sun damage and extends its life.
- Maintenance and reapplication. Plan to reapply waterproofing periodically to maintain dependable protection.
How Common Are Waterproofing Choices?
Two Real Projects That Prove the Method Works
Case study 1: Johnson family patio, Seattle. Their 12×14-foot flat plywood deck had mold and warping. After replacing two sheets, the contractor applied epoxy seam resin, two coats of sealer, and UV-resistant varnish. Cost: $1,800. Two years later, the deck stayed rot- and mold-free, avoiding $4,200 in repairs. For a broader understanding, review this complete guide to professional waterproofing methods for homeowners and builders.
Case study 2: Rivertown Condos balcony project. Eight balconies had water damage. The property manager installed an elastomeric liquid waterproofing system and a durable topcoat. Cost: $12,500. Service life extended by 10 to 15 years, avoiding $45,000 in replacement costs over two years.
Note: Prices are examples and may not reflect actual costs.
The Consequences of Ignoring Waterproofing
Moisture penetrates seams, under flooring, and into framing. Small leaks accelerate deterioration and may force full deck or roof replacement. Replacing a plywood deck costs three to six times as much as preventive waterproofing, excluding lost time and disruption. Neglecting waterproofing can cause dry rot, a fungal decay entering through wood cracks.
Choosing DIY or a Pro with Clear Answers
Common concerns:
- “I can save money doing it myself.” True, but improper application, poor seam repairs, or incorrect curing cause early failure. Professionals understand materials, drying in high humidity, and sequencing to avoid callbacks.
- “The chemicals and fumes worry me.” Low-VOC and water-based sealers reduce odors and exposure. With proper PPE and ventilation, homeowners can safely apply most products.
- “I don’t want an ugly finish.” Many systems offer attractive, paintable topcoats that protect while enhancing appearance. Choose a finish matching your deck or decorative coating.
Other concerns include drying time, cost, and warranties. Pick products with clear instructions and guarantees. For lower risk, get a free pro quote with inspection, materials, and a fixed price, especially for specialized applications like boat decks.
Applying the First Coat for Effective Waterproofing
The first coat is critical, forming the base for all layers. Apply a high-quality primer or sealant evenly across the entire surface for strong adhesion, durability, and an aesthetically pleasing finish. Use a paint roller for broad areas and a brush for edges to ensure complete coverage. Applying sealant to edges and ends with a smaller brush ensures thorough protection.
Additional Tips for Troubleshooting and Maintenance
- If the deck sealer fails to adhere, strip any previous coatings and reapply the sealer after the surface is clean and dry.
- Check for signs of fungal growth or soft spots in the decking to identify rot or mold.
- To address flaking or peeling of deck stains or sealers, remove loose sealant, sand lightly, and reapply a fresh coat.
- Avoid applying sealant in hot, direct sunlight to prevent it from drying too quickly and reducing its effectiveness.
- Use a roller or brush designed for deck sealing to apply the sealer evenly across the entire surface.
- After waterproofing, wipe the surface clean and let it dry completely before use.
- Proper slope (ideally 1/4 inch per foot) ensures water drains off the deck, preventing pooling and damage.
Advanced Waterproofing Products and Systems
For maximum protection, consider these options:
- Liquid Rubber: A polyurethane liquid rubber sealant designed for decks and wood surfaces, forming a flexible, seamless, and durable membrane.
- Econodek Vinyl Decking: A DIY waterproof vinyl deck system that provides a walkable, waterproof surface over plywood decks.
- Life Specialty Coatings Systems: Including the AL System (metal lath-reinforced), AL-Flex System (fiberglass and resin), FM System (fiberglass reinforced), and LD-2000 System (elastomeric polyurethane), all designed for durability, flexibility, and waterproofing in high-traffic areas.
Incorporating these products into your next project can enhance durability and reduce maintenance.
Take Action Now and Protect Your Deck
Waterproof your plywood deck today to preserve structural integrity and keep mold and moisture out. Request a free quote, book an inspection, and get a fixed cost to seal seams, apply sealant, and finish with a durable topcoat resisting UV, wear, and weathering. For additional guidance, see how to waterproof plywood decks and roofs. This cheaper investment prevents major headaches and extends your deck’s life.
Frequently Asked Questions
How long should I wait between coats?
Drying time depends on the product and humidity. Most sealers need 4 to 24 hours between layers; epoxy systems often require 24 hours. High humidity extends cure times. Avoid applying sealant in hot, direct sunlight to prevent it from drying too quickly and reducing its effectiveness.
Can I use paint or varnish by itself?
Paint alone won’t stop moisture penetration in the long term. Pair an epoxy or penetrating sealer with varnish or paint for durable, waterproof protection and UV resistance.
Do I need to replace plywood before waterproofing?
Yes. Replace soft, holey, or rotted plywood. Waterproofing over compromised material only delays failure and worsens structural issues.
Is waterproof plywood the same as treated lumber?
Waterproof plywood resists moisture but still benefits from waterproofing systems. Treated lumber resists rot; sealing improves long-term durability against weathering.
Will waterproofing prevent mold and mildew?
Proper waterproofing reduces moisture intrusion and the risk of mold. Good ventilation and regular cleaning further prevent mold, especially on covered patios and balconies.
What if it rains on the liquid rubber deck coating before it dries?
Rain before drying can damage the coating, washing it off and requiring reapplication. After drying, inspect and reapply if compromised. Allow full cure before use.
What if the deck sealer flakes or peels?
Remove loose sealant, sand lightly, and reapply a fresh coat. Check for fungal growth or soft spots indicating rot or mold. If the sealer doesn’t adhere, strip previous coatings and reseal after cleaning and drying.